Disclosure: This post contains affiliate links. If you buy through them, BloomBabe may earn a small commission at no extra cost to you. As an Amazon Associate, I earn from qualifying purchases. We only recommend gear we’d use on our own plants.
Boston Ferns have a reputation for being dramatic, and honestly? Fair. Bring one home from the garden center, hang it in a sunny window, forget it for five days, and you’ll come back to a pile of crispy brown confetti on the floor.
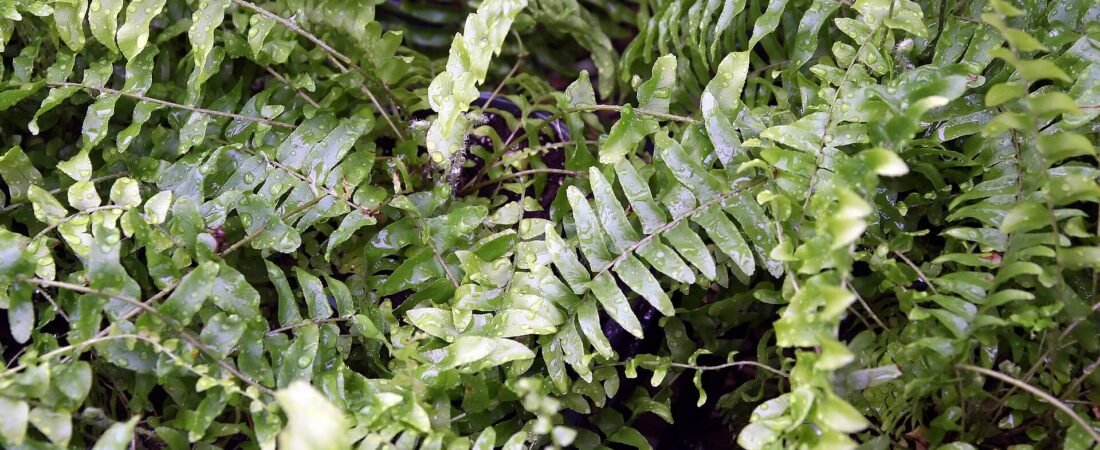
But that reputation misses something. Boston Ferns aren’t fussy so much as specific. They want three things — steady moisture, humidity, and gentle light — and once you’ve got those dialed in, they’re one of the most rewarding plants you can grow. A happy one throws out arching fronds three feet long and looks like something out of a Victorian conservatory.
Here’s everything we’ve learned keeping ours full instead of frizzy.
Meet the Boston Fern
Boston Fern (Nephrolepis exaltata ‘Bostoniensis’) is a cultivar that showed up as a chance sport in a Philadelphia shipment back in 1894 and got picked up by a Boston grower — hence the name. It’s been a porch-and-parlor staple ever since.
In the wild, its relatives grow in humid subtropical forests, often perched in the crooks of trees or along shaded stream banks. That’s the whole care guide in one sentence, really: dappled light, damp air, never bone dry.
A few varieties you’ll run into:
- ‘Bostoniensis’ — the classic, with long arching fronds. The one most stores sell.
- ‘Dallas’ (or ‘Dallas Jewel’) — more compact and noticeably more forgiving about humidity. Great first fern.
- ‘Fluffy Ruffles’ — dense, upright, ruffled fronds. Stiffer and tidier looking.
- ‘Kimberly Queen’ — technically a different species (N. obliterata), but sold alongside these. Tougher, tolerates more sun and drier air. If you’ve killed two Boston Ferns, buy this one.
One nice bonus: Boston Ferns are non-toxic to cats and dogs, which is rarer than you’d think in the houseplant world.
Light
Bright, indirect light. That’s the sweet spot.
- Ideal: a north-facing window, or a few feet back from an east-facing one where it gets soft morning light.
- Works fine: medium light, filtered through a sheer curtain.
- Avoid: hot afternoon sun through glass. Direct sun scorches fronds fast, bleaching them pale and then browning the tips.
Too little light is a slower problem, but it’s still a problem — the plant gets sparse and leggy, and new growth comes in thin. If your best spot is genuinely dim, a soft LED grow light on a timer for 8–10 hours will fill it back out over a couple of months.
Rotate the pot a quarter turn every week or two. Ferns lean toward light just like everything else, and rotating keeps the shape even and round instead of one-sided.
Water
This is where most Boston Ferns die, and the failure mode is almost always the same: the soil dried out completely while nobody was looking.
Unlike a Snake Plant or a Pothos, a Boston Fern has no water reserves to fall back on. Those thin fronds lose moisture constantly. Once they crisp, they don’t recover — you’re waiting on new growth to replace them.
The rule: keep the soil consistently, lightly moist. Never soggy, never bone dry.
- Check the top inch with your finger every two or three days. When it feels barely damp, water.
- Water thoroughly until it runs out the drainage holes, then let it drain fully. Don’t leave the pot sitting in a saucer of standing water.
- In practice that’s often twice a week in summer, and closer to once a week in winter — but check, don’t schedule.
If you struggle with consistency (no judgment — we all do), two things help enormously. A soil moisture meter takes the guessing out entirely, and a self-watering pot gives the plant a reservoir to sip from between your visits. Ferns are one of the few plants where we genuinely recommend self-watering pots without reservation.
Room-temperature water is best. Ice-cold water straight from the tap can shock the roots.
Soil
Boston Ferns want a mix that holds moisture without turning into mud — light, airy, and organic-rich.
A good starting point:
- 2 parts quality indoor potting mix
- 1 part coco coir or peat for water retention
- 1 part perlite for drainage and air pockets
That combination stays evenly damp for days but still drains freely, which is exactly the balance a fern’s fine roots need.
Skip heavy garden soil and skip cactus mix — one holds too much water, the other far too little. And always use a pot with drainage holes. Hanging baskets are a classic look here, but check that yours actually drains; plenty of decorative ones don’t.
Fertilizer
Ferns are light feeders, and they’ll tell you loudly when you overdo it — burnt, brown frond tips are usually fertilizer salts, not thirst.
- Feed once a month during spring and summer.
- Use a balanced liquid houseplant fertilizer diluted to half strength. Half. Every time.
- Stop entirely in fall and winter when growth naturally slows.
Once or twice a year, flush the pot: run plain water through the soil for a minute or two to rinse out accumulated mineral salts. It’s a small habit that prevents a lot of brown tips.
Temperature & Humidity
Temperature is easy. Between 60–75°F is perfect, and they’re comfortable in the same range most of us keep our homes. Below 50°F causes damage, so keep them off cold windowsills and away from doors that open all winter.
Humidity is the harder one, and it’s the real reason so many Boston Ferns struggle indoors. They want 50% or higher. Heated homes in winter routinely sit at 20–30%.
What actually works:
- A humidifier. By a wide margin the most effective fix. A small cool-mist humidifier running near the plant does more than everything else on this list combined.
- A pebble tray. Fill a shallow tray with pebbles and water, set the pot on top — the pot base stays above the waterline. Modest help, but free and easy.
- Grouping plants. Cluster your ferns with other humidity lovers. They create a slightly damper pocket of air together.
- Bathrooms and kitchens. If you have a bright bathroom, a Boston Fern will be thrilled there.
Misting? It looks lovely and helps for about twenty minutes. It’s not a humidity strategy — but if you enjoy it, no harm done. Just don’t count on it.
Also keep ferns away from heating and AC vents. Moving dry air dehydrates fronds faster than almost anything else.
Repotting
Repot in spring, every 1–2 years, or whenever roots start crowding out the surface and water runs straight through without soaking in.
Go up just one pot size — about two inches wider. An oversized pot holds more wet soil than the roots can use, and that’s how you get rot.
While the plant is out, take a look at the root ball. Boston Ferns build up a dense mat of roots and old rhizomes over time; you can trim off any dead brown sections and gently loosen the outside of the ball before repotting. This is also the natural moment to divide.
Propagation
Division is the way. Boston Ferns don’t propagate from cuttings — no fronds in water, sorry.
- Water the plant a day ahead so it’s well hydrated, then slide it out of the pot.
- Look for natural clumps in the root mass. Separate a section with a healthy handful of roots and several fronds attached, using clean pruning shears if the roots are too dense to pull apart.
- Pot each division into fresh mix at the same depth it was growing before.
- Water well and keep the divisions extra humid for two to three weeks while they settle. Some frond droop right after division is normal.
You may also see thin, wiry runners trailing out of the pot. Those are stolons, and if you pin one down into a small pot of moist soil while it’s still attached to the parent, it’ll root into a new plant on its own.
Common Problems
Brown, crispy fronds and leaflets dropping everywhere. Dry air, dry soil, or both. The single most common Boston Fern complaint. Increase humidity, water more consistently, and move it away from any vent.
Yellowing fronds, soil stays wet. Overwatering or poor drainage. Let the top inch dry before the next drink and check that the pot actually drains.
Pale, washed-out fronds. Too much direct sun. Move it back from the window.
Sparse, leggy, thin new growth. Not enough light, or it needs feeding and repotting.
Brown tips only, plant otherwise fine. Usually fertilizer salt buildup or hard tap water. Flush the soil, dilute feed further, or switch to filtered water.
Pests. Ferns are prone to mealybugs and scale, and they’re sensitive plants — always spot-test before treating widely. Insecticidal soap is gentler on fronds than most oils. If you use neem oil, dilute it well and keep the plant out of direct sun afterward.
Shedding a bit constantly? Some leaflet drop is just what ferns do. A little is normal. Handfuls are a signal.
Frequently Asked Questions
Are Boston Ferns safe for cats and dogs? Yes — they’re listed as non-toxic to both. One of the reasons they’re such a popular pick for pet households.
Can I put mine outside for the summer? Absolutely, and it’ll love you for it. Shade or dappled light only, and bring it back in before nights drop below 50°F. Check carefully for hitchhiking pests before it comes inside.
Should I cut off the brown fronds? Yes. Trim them at the base with clean shears. It won’t hurt the plant and it redirects energy into new growth.
My fern looks awful — is it dead? Maybe not. If the crown and roots are still firm, cut every frond back to about two inches, keep the soil moist and humidity high, and give it a few weeks. Boston Ferns regenerate from the crown surprisingly often.
Why does it shed so much right after I bring it home? Greenhouse humidity is much higher than your living room. Some acclimation drop is normal for the first few weeks. Keep conditions steady and it settles.
Quick-Start Gear Checklist
- 💦 Cool-mist humidifier — the single best upgrade
- 💧 Soil moisture meter
- 🪴 Indoor potting mix + perlite + coco coir
- 🏺 Self-watering pot or a well-draining hanging planter
- 🌿 Liquid houseplant fertilizer (use at half strength)
- ✂️ Pruning shears
- 🐛 Insecticidal soap
Get the humidity right and the rest of Boston Fern care is mostly just showing up with a watering can twice a week. Give it soft light, damp soil, and air that isn’t desert-dry, and it’ll reward you with those big arching fronds that make a room feel green and alive. Happy growing, from all of us at BloomBabe. 🌿