Disclosure: This post contains affiliate links. If you buy through them, BloomBabe may earn a small commission at no extra cost to you. As an Amazon Associate, I earn from qualifying purchases. We only recommend gear we’d use on our own plants.
Some plants blend into a room. Alocasia is not one of them. Those arrowhead leaves held up on tall, skinny stems look almost sculptural — like someone staged them there on purpose. It’s the plant people notice from across the room, and it’s the reason a lot of us fell down the houseplant rabbit hole in the first place.
It’s also the plant that makes people think they’ve lost their touch. Alocasia are dramatic in personality too: they drop leaves when they’re annoyed, they attract spider mites like a magnet, and in winter they can vanish entirely and look completely dead. Almost none of that means you killed it.
Here’s what Alocasia actually needs, what its dramatics really mean, and how to keep yours pushing out new leaves instead of losing them.
Meet the Alocasia
Alocasia is a genus in the aroid family (same relatives as Monstera, Philodendron, and Pothos), native to the tropical forests of Southeast Asia through eastern Australia. In the wild they grow on humid forest floors under a canopy — warm, bright but shaded, never scorched, never dry for long. That single sentence explains most of their care.
The types you’ll actually run into:
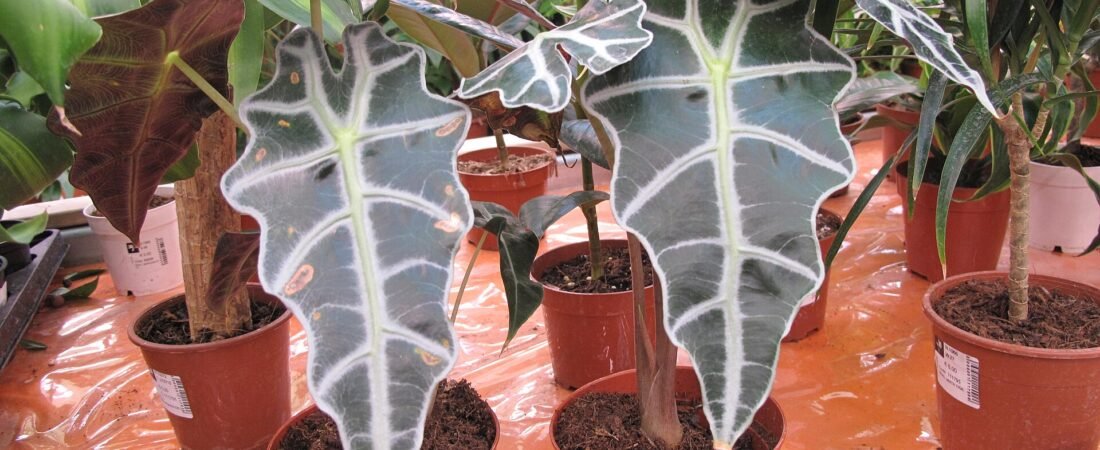
- ‘Polly’ / African Mask Plant (Alocasia × amazonica) — the classic. Dark leaves, bold white veins, scalloped edges.
- ‘Frydek’ (A. micholitziana) — velvety deep green with bright white veining. A stunner and a bit fussier.
- ‘Black Velvet’ (A. reginula) — compact, near-black leaves with a suede texture. Stays small.
- ‘Zebrina’ (A. zebrina) — grown as much for the striped, zebra-print stems as the leaves.
- ‘Silver Dragon’ (A. baginda) — pale silvery leaves with dark, reptilian veining.
- ‘Regal Shields’ and A. macrorrhiza — the giants. These want floor space, not a shelf.
One thing that sets Alocasia apart from most houseplants: they grow from corms, little underground storage tubers. That’s why they can go fully dormant and come back, and it’s why propagation works completely differently than it does for a Pothos.
Light
Bright, indirect light. This is where Alocasia is genuinely non-negotiable.
- Ideal: a few feet back from an east or north-facing window, or behind a sheer curtain at a bright south or west window.
- Too little light: stems stretch long and floppy, new leaves come in smaller than the old ones, and growth basically stalls.
- Too much: harsh midday sun bleaches and scorches those leaves fast, especially the velvety types like Frydek and Black Velvet.
If your brightest spot still isn’t bright, this is a plant that responds really well to supplemental light. A full-spectrum LED grow light running 10–12 hours a day makes a visible difference within a couple of leaf cycles.
Water
Alocasia want evenly moist soil — never soggy, never bone dry. They’re one of the few plants that will punish you for both extremes, which is why they get the “fussy” reputation.
The practical version: water thoroughly when the top 1–2 inches of soil feel dry, and let the excess drain all the way out. Don’t wait for the whole pot to dry like you would with a Snake Plant — a fully dry Alocasia drops leaves quickly.
- Underwatered: drooping stems, crispy brown edges, leaves yellowing and dropping.
- Overwatered: yellowing that starts at the base, mushy stems, a sour smell from the soil, no new growth.
Those two lists overlap enough that guessing is a losing game. A soil moisture meter is genuinely worth it here — more than for almost any other houseplant. Water less in fall and winter, when growth slows way down.
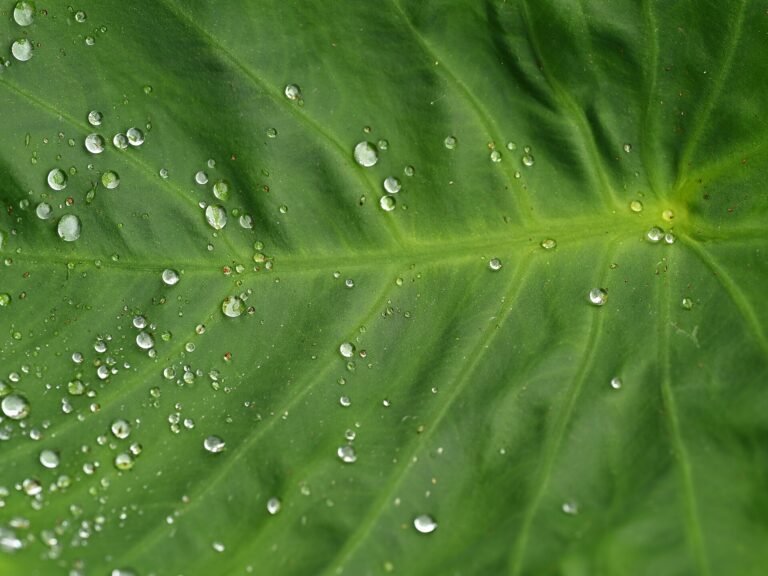
Normal thing that scares people: little water droplets on the leaf tips in the morning. That’s guttation, and it just means the plant is well hydrated and pushing out excess moisture. Not a problem.
Soil
Chunky, airy, fast-draining. Standard potting soil straight from the bag holds too much water around the roots and is the fastest route to rot.
Use a proper aroid potting mix, or mix your own — roughly equal parts quality potting soil, orchid bark, and perlite, with a handful of coco coir if you have it. You want a mix that water runs through, not one that stays heavy for days.
Drainage holes are mandatory. A plain plastic nursery pot tucked inside a decorative cachepot is the easiest setup — you get real drainage and still get the look.
Fertilizer
Alocasia are hungry during the growing season. Those big leaves cost the plant something to build.
Feed with a balanced liquid houseplant fertilizer diluted to about half strength, every 2–4 weeks from spring through late summer. Stop completely in fall and winter — feeding a slowing plant just builds up salts in the soil. If you’ve been fertilizing a while, flush the pot with plain water every few months to rinse those salts out.
Temperature & Humidity
This is the other half of the tropical-forest-floor equation.
- Temperature: 65–80°F is the sweet spot. Below 60°F they sulk, and below 50°F they’re at real risk. Keep them away from drafty doors, cold windows in winter, and the direct blast of AC or heating vents.
- Humidity: 60% or higher is ideal. Under about 40%, expect crispy brown leaf edges and a much friendlier environment for spider mites.
Most homes sit closer to 30–40%, especially with the heat running. A small cool mist humidifier near your plants is the only fix that reliably works — misting evaporates in minutes and doesn’t move the needle. Grouping plants together helps a little, and a pebble humidity tray helps a little more. A cheap hygrometer takes the guesswork out entirely.
Repotting
Alocasia like being a bit snug, and they hate being disturbed, so repot only every 1–2 years — or when roots are circling the bottom and water runs straight through.
Do it in spring, at the start of the growing season, and go up just one pot size. Too much extra soil holds too much water around a root system that isn’t ready to use it. Expect a little sulking (a drooped leaf, a pause in growth) for a week or two afterward. That’s normal.
While you’ve got it out of the pot, look for corms — small, firm, roundish bulbs along the roots. Those are your free plants.
Propagation
Here’s where Alocasia breaks the usual houseplant rules: you cannot propagate one from a leaf or a stem cutting. A cut leaf in water will just rot. There’s no node on the stem to root from.
Instead, propagate by division:
- Unpot the plant and gently loosen the soil so you can see the root system.
- Look for offsets (small plantlets with their own roots) or firm corms attached along the roots.
- Separate them by hand where you can; use clean pruning shears where you can’t.
- Pot offsets in the same chunky mix. For bare corms, peel the brown papery layer, then set them in damp sphagnum moss or perlite in a covered container somewhere warm and bright.
Corms are slow. It can take a few weeks to see a root and a couple of months to see a first leaf. Firm and plump means it’s still alive and working — squishy means it’s done.
Common Problems
- Spider mites. The number one Alocasia pest, and dry air is the invitation. Look for fine webbing where the leaf meets the stem and tiny pale speckles across the leaf. Treat immediately with neem oil or insecticidal soap, repeat weekly for a few weeks, and raise the humidity. Check the undersides of leaves — that’s where they live.
- A leaf yellows and dies whenever a new one unfurls. Usually not a problem at all. Alocasia tend to maintain a set number of leaves; trading an old one for a new one is normal behavior.
- Sudden leaf drop in fall/winter. Almost always dormancy, not death (more below).
- Brown crispy edges. Low humidity, or inconsistent watering.
- Drooping across the whole plant. Check the soil first — this is the classic symptom that means either too dry or too wet. The meter settles it.
- Yellowing from the base up, mushy stems. Root rot. Unpot, cut away any brown, soft roots, and repot in fresh, chunky, barely-damp mix.
About dormancy
If your Alocasia loses every leaf in winter, don’t throw it out. In lower light and cooler temperatures they retreat into the corm and wait. Keep the pot somewhere warm, give it just enough water to keep the soil barely damp, stop fertilizing, and be patient. Many come back in spring on their own. Dig gently and feel for the corm — firm means alive.
Frequently Asked Questions
Is Alocasia toxic to pets? Yes. All parts contain calcium oxalate crystals, which cause mouth pain, drooling, and swelling if chewed by cats, dogs, or kids. Keep it well out of reach.
Why does my new leaf come in smaller than the last one? Almost always not enough light, sometimes not enough food. Move it brighter before you change anything else.
Can Alocasia live in water or semi-hydro? Yes — many people have great luck moving them to LECA or a semi-hydro setup, and it can actually reduce root rot problems. Transition carefully by rinsing all soil from the roots first.
Is ‘Polly’ really the easiest one? Generally, yes. ‘Polly’ and ‘Zebrina’ are the most forgiving starting points. Velvety types like ‘Frydek’ and ‘Black Velvet’ want higher humidity and less room for error.
Should I mist it? It won’t hurt, but it won’t meaningfully raise humidity either. A humidifier does the real work.
Quick-Start Gear Checklist
- 💧 Soil moisture meter — the single most useful tool for this plant
- 🪴 Aroid potting mix, or make your own with perlite and bark
- 🌫️ Humidifier and a hygrometer to track the room
- 💡 LED grow light if your space is dim
- 🌿 Balanced houseplant fertilizer
- 🐛 Neem oil — buy it before you need it
Alocasia asks for a little more attention than a Pothos, and it gives you a lot more drama in return. Get the light and the humidity right, keep the soil evenly damp in a mix that drains fast, and check for mites now and then — that’s really the whole job. And if it drops everything one winter, give it until spring before you give up on it. They’re far tougher underground than they look. Happy growing, from all of us at BloomBabe. 🌱